Call for Free Estimates and Financing!
Understanding how to install a roof is essential for anyone planning a roofing project, whether you’re a homeowner researching the process or a contractor refining your skills. Roof installation is one of the most important construction tasks because it protects the entire structure from weather, moisture, and structural damage. A properly installed roof ensures long-term durability, energy efficiency, and safety.
This guide walks you through the complete roof installation process, breaking it down into clear stages while offering practical roof installation tips to help ensure the job is done correctly from start to finish.
Understanding the Roof Installation Process
Before diving into the hands-on steps, it’s important to understand what the roof installation process involves. A typical roof installation includes:
- Removing the old roofing material (if applicable)
- Inspecting and repairing the roof deck
- Installing underlayment and waterproof barriers
- Placing shingles or roofing material
- Adding flashing, ridge caps, and finishing components
Each stage plays a critical role in ensuring your roof performs well against rain, wind, heat, and other environmental factors.
Step 1: Preparing the Roof Area
The first step in any step by step roof installation is preparation. This includes:
- Removing old shingles or roofing materials
- Cleaning debris from the roof surface
- Inspecting the roof decking for rot or damage
- Replacing any weak or damaged sections
A solid foundation is essential. If the roof deck is not structurally sound, even the best roofing materials will fail over time.
Tip: Always inspect for hidden water damage. It’s one of the most common issues that can compromise a new roof.
Step 2: Installing Drip Edge and Underlayment
Once the roof deck is ready, the next step in the roof installation guide is applying protective layers.
Drip Edge Installation
A drip edge is installed along the edges of the roof to guide water away from the fascia and prevent water damage.
Underlayment Installation
Underlayment acts as a secondary barrier against moisture. It is rolled out horizontally across the roof deck, starting from the bottom and working upward.
There are different types of underlayment, including:
- Asphalt-saturated felt
- Synthetic underlayment (more durable and water-resistant)
Tip: Overlap each row properly to prevent water infiltration.
Step 3: Installing Ice and Water Shield
In areas prone to heavy rain or ice buildup, an ice and water shield is installed along roof edges, valleys, and vulnerable sections.
This self-adhering membrane provides extra protection against leaks caused by ice dams or wind-driven rain.
Tip: Pay special attention to roof valleys—they handle the highest water flow.
Step 4: Laying the Starter Shingles
Starter shingles are installed along the roof edges before the main shingles. They help seal the first row and improve wind resistance.
This step is often overlooked, but it is crucial for preventing uplift during strong winds.
Tip: Make sure starter shingles align properly with the drip edge for a clean, sealed edge.
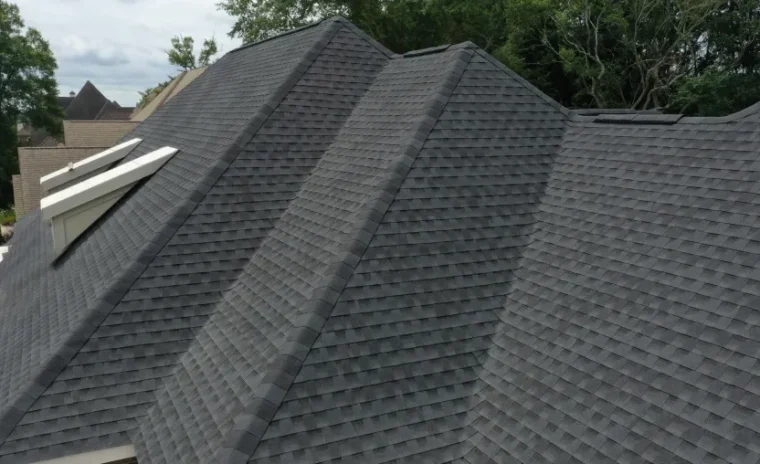
Step 5: Installing the Main Shingles
This is the most visible and time-consuming part of the roof installation process.
Shingles are installed starting from the bottom edge of the roof and working upward in overlapping rows. This overlapping pattern ensures water flows downward without seeping underneath.
Key considerations:
- Maintain consistent alignment
- Use proper nail placement
- Avoid overdriving or underdriving nails
- Stagger shingle joints for strength and appearance
There are several types of shingles, including asphalt, architectural, and composite materials.
Tip: Follow manufacturer instructions carefully for spacing and fastening requirements.
Step 6: Flashing Installation
Flashing is installed around roof penetrations such as chimneys, vents, and skylights. It prevents water from entering vulnerable areas.
Common materials include aluminum or galvanized steel.
Areas that require flashing:
- Chimneys
- Roof valleys
- Skylights
- Vent pipes
Tip: Improper flashing installation is one of the leading causes of roof leaks.
Step 7: Installing Ridge Caps
Ridge caps are installed at the peak of the roof where two slopes meet. They provide both protection and a finished appearance.
These caps are specially designed shingles that overlap the ridge line, sealing the roof’s highest point against water and wind.
Tip: Ensure proper ventilation is maintained when installing ridge caps to avoid moisture buildup in the attic.
Step 8: Final Inspection and Cleanup
Once the shingles and components are installed, a final inspection is essential.
Check for:
- Loose or missing shingles
- Proper alignment
- Secure flashing
- Clean edges and ridges
Also, clean the surrounding area by removing nails, debris, and leftover materials.
Tip: Use a magnetic roller to collect stray nails around the property.
Important Roof Installation Tips
To ensure a successful installation, keep these important tips in mind:
1. Safety First
Roofing is dangerous work. Always use safety harnesses, proper footwear, and stable ladders.
2. Check Weather Conditions
Avoid installing a roof during rain, strong winds, or extreme heat.
3. Use Quality Materials
High-quality materials last longer and perform better under harsh conditions.
4. Follow Manufacturer Guidelines
Each roofing material comes with specific installation requirements.
5. Don’t Rush the Process
Proper installation takes time. Rushing can lead to costly mistakes.
Common Mistakes to Avoid
Even with a good roof installation guide, mistakes can happen. Avoid these common errors:
- Skipping underlayment
- Incorrect nail placement
- Poor flashing installation
- Misaligned shingles
- Ignoring ventilation needs
These mistakes can shorten the lifespan of your roof and lead to expensive repairs.
Conclusion
Learning how to install a roof involves understanding each stage of the process, from preparation to final inspection. A successful installation depends on careful planning, attention to detail, and following proven roofing methods.
Whether you are studying the step by step roof installation process or planning a real project, following these guidelines will help ensure a strong, durable, and long-lasting roof. Proper installation not only protects your home but also improves energy efficiency and overall property value.
By following this roof installation guide and applying practical roof installation tips, you can better understand what it takes to complete a roofing project the right way.